Video content has taken over social media platforms like Instagram Reels, TikTok, YouTube Shorts, and Facebook. However, editing professional-looking videos doesn’t require expensive software or a powerful PC. With mobile apps like InShot, you can edit high-quality videos directly from your smartphone in minutes.
Whether you’re a content creator, business owner, or casual user, this guide will walk you through everything you need to know to master video editing on InShot.
What is InShot?
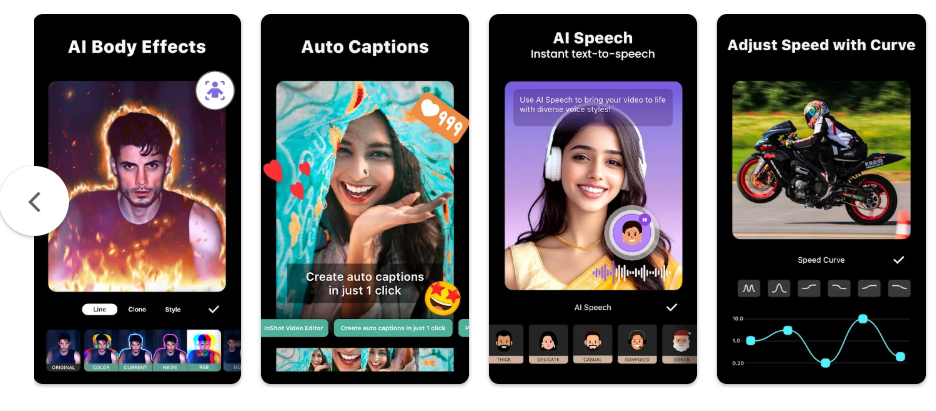
InShot is a powerful, user-friendly mobile video editing and photo editing application available on both Android and iOS devices. Designed specifically for mobile content creators, InShot offers features like video trimming, merging, speed adjustments, voiceovers, filters, text animations, and aspect ratio adjustments.
Key Highlights:
- Easy-to-use timeline interface.
- Pre-set aspect ratios tailored for platforms like TikTok (9:16), YouTube (16:9), and Instagram (1:1 / 4:5).
- Library of royalty-free sound effects, music, and stickers.
- Export videos in high resolution up to 4K at 60fps.
How to Install InShot on Android and iOS
Getting started with InShot is quick and free.
For Android:
- Open the Google Play Store.
- Search for InShot – Video Editor.
- Tap Install.
- Once installed, grant permissions for photo and video access when prompted.
For iOS (iPhone/iPad):
- Open the Apple App Store.
- Search for InShot – Video Editor.
- Tap Get to download and install.
- Allow access to your photo library to start importing media.
How to Install InShot on Android and iOS
Getting started with InShot is quick and free.
For Android:
- Open the Google Play Store.
- Search for InShot – Video Editor.
- Tap Install.
- Once installed, grant permissions for photo and video access when prompted.
For iOS (iPhone/iPad):
- Open the Apple App Store.
- Search for InShot – Video Editor.
- Tap Get to download and install.
- Allow access to your photo library to start importing media.
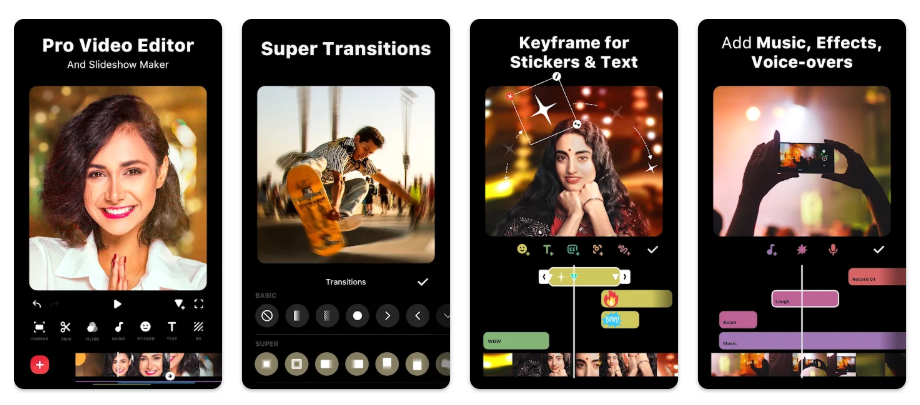
| Tool | Function | Best Used For |
| Canvas | Adjusts video frame size and ratio. | Tailoring formats for TikTok (9:16) or YouTube (16:9). |
| Precut / Split | Trims, cuts, or deletes portions of a video track. | Removing awkward silences or unwanted footage. |
| Music Tracks / Effects | Adds background audio, sound effects, or voiceovers. | Adding mood or commentary to video clips. |
| PIP (Picture-in-Picture) | Overlays images or secondary videos on top of the main clip. | Reaction videos, screen recordings, or logo overlays. |
| Filters & Effects | Applies color presets or visual FX (Glitch, Blur, Zoom). | Changing tone, color grading, or adding stylized transitions. |
| Text & Stickers | Adds dynamic text titles, subtitles, or stickers. | Adding captions, call-to-actions, or visual cues. |
| Speed | Speeds up (time-lapse) or slows down (slow-motion) footage. | B-roll sequences or dramatic action shots. |
| Volume & Noise Reduction | Adjusts clip audio level or removes background hiss. | Cleaning up recorded dialogue. |
Step-by-Step: How to Edit a Simple Video on InShot
1. Create a New Project:Prerequisite: Have media saved in gallery.
Open the InShot app, select Video, then tap New. Select the video clips and images from your photo gallery that you want to edit, then tap the green checkmark at the bottom right.
2. Set the Canvas Ratio:Determines export aspect ratio.
Tap the Canvas icon. Choose the aspect ratio matching your target platform (e.g., 9:16 for TikTok/Reels, 16:9 for YouTube). Pinch to zoom or resize the clip if necessary.
3. Trim and Cut Unwanted Portions:Basic timeline editing.
Scroll through the timeline to find unwanted parts. Drag the white line (playhead) to where you want to cut, tap Split, move to the end of the unwanted section, tap Split again, select the middle clip, and tap Delete.
4. Add Transitions and Effects:Optional polish.
Tap the small square icon between two clips on the timeline to open the Transitions menu. Choose a subtle effect like Fade or Slide to connect clips smoothly.
5. Add Background Music and Captions:Audio & Text overlay.
Tap Music to add built-in tracks, sound effects, or record a live Voice Effect / Voiceover. Next, tap Text to insert titles or captions, adjusting font style and animation under the edit settings.
6. Export and Share:Final step.
Tap the Save icon at the top right corner. Select your preferred resolution (1080p or 4K) and frame rate (30fps or 60fps). Tap Save to render the video directly to your camera roll.
Common Beginner Mistakes to Avoid
- Ignoring the Canvas Ratio: Uploading a landscape (16:9) video to TikTok/Reels without adjusting the ratio leaves black bars or awkward cropping. Always select the right canvas before editing.
- Overusing Visual Effects: Applying too many flashy transitions or glitch effects makes videos look chaotic and unprofessional. Keep transitions minimal.
- Background Music Too Loud: When adding background audio over a speaking voice, ensure the music volume is lowered (around 10%–20%) so speech remains crisp and audible.
- Exporting at Low Quality: Always verify export settings before saving. Default settings may lower your video quality; aim for 1080p at 30fps or 60fps for crisp playback.
Upgrade to InShot Pro / Premium
While the free version of InShot provides plenty of functionality, upgrading to InShot Pro unlocks additional advanced tools:
- No Watermarks: Remove the InShot watermark automatically on all exports.
- Ad-Free Experience: Edit without banner or video ad interruptions.
- Full Access to Assets: Unlocks all premium filters, video effects, fonts, transition packs, and stickers.
The best video editor is the one you actually use. Whether you choose InShot for its mobile convenience or eventually graduate to DaVinci Resolve for professional desktop workflows, the software is merely a vehicle for your creativity.
Remember these three rules of thumb:
- Content is King: A perfect edit cannot save a boring concept, but a simple edit can elevate a great story. Don’t get lost in complex transitions at the expense of your message.
- Audio is 50% of the Experience: Viewers will stick around for average visuals, but they will leave instantly if the audio is muddy, inconsistent, or overpoweringly loud. Prioritize clean dialogue above all else.
- Consistency Beats Perfection: You will learn more by finishing ten “good enough” videos than by spending months obsessing over one “perfect” masterpiece. Publish, analyze what worked, and iterate.
Editing is a skill built through “reps.” Your first few videos might feel clunky or take hours to assemble, but with each project, your muscle memory will improve, your workflow will sharpen, and your unique style will emerge. Keep experimenting, keep cutting, and keep creating.
Important Links
- Android – Playstore Download Link
- IOS – App Store Download Link